
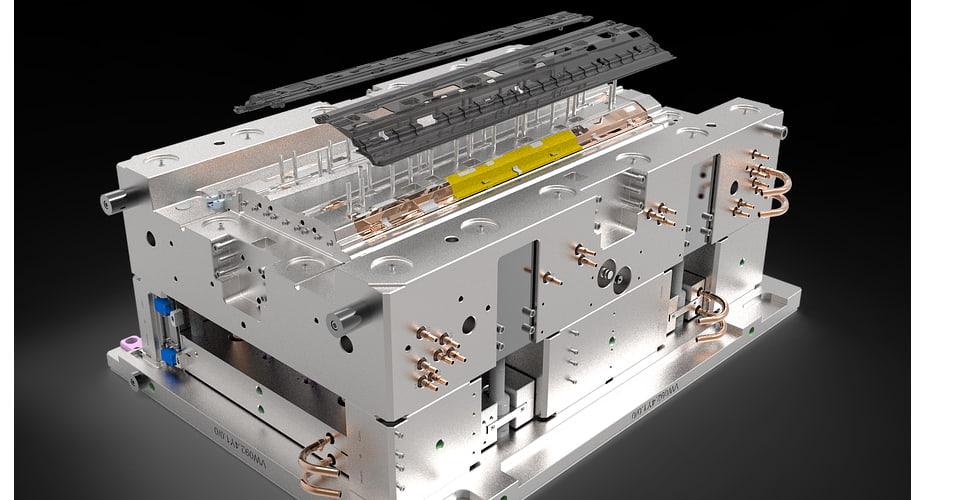
Experienced designers are the key to plastic injection mold manufacturing, with expertise and innovative ideas to meet the growing needs of our customers. With years of experience and creative solutions, LUSHI can create favorable prerequisites for accelerate your product development cycle. Intervention in the product development phase can present the product more perfectly. The more precise the design before going to the injection molding process, the less rework is required. This can greatly reduce budget and time costs and optimize manufacturing processes.
Feasibility analysis
We take over the project from the customer, review the product structure, and provide feedback on the feasibility based on the DFM report. In order to optimize the product, we provide some useful suggestions to the customer to prevent all possible problems in the future production stage.
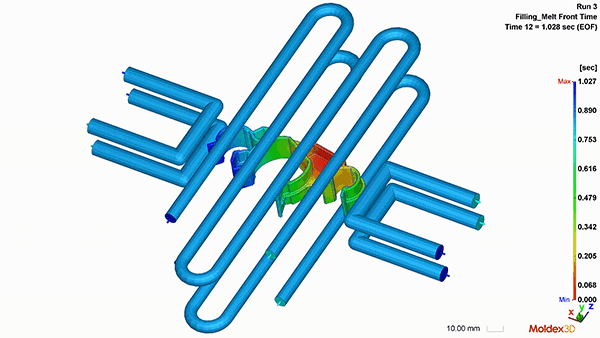
Moldflow-Simulation
With the help of Moldflow software, we will determine the optimum position of the mold and the best temperature control before the production of plastic parts. As an important part of the concept phase, MoldFlow can simulate the physical behavior of plastic parts. By simulating the production process, critical areas such as air pockets, weld lines, or dents can be predicted and modified. This reduces the total cost and guarantees the highest product quality.
Filling analysis
We offer the latest CAD and CAE technology for simulating injection-molded parts. Our experienced engineers can simulate before installing an injection mold to predict fill status. Because uneven mold filling can significantly affect the shaping of the actual product, This problem can be prevented by an early MoldFlow-analysis.
Design guidelines that you should consider
There are many factors that need to be considered in injection molding, and the design of the injection molded part and tool play two crucial elements. Precise mold design provides lower costs, higher productivity, and shorter cycle times. If not, it will cost a considerable amount of time and money.
Wall thickness
The thinner the plastic part, the easier the injection molding process. Injection molded parts with a thin wall thickness cool faster, saving the material. This means shorter cycle times, have an increase in the output per hour and lower production costs.
The wall thickness also depends on the material used. Injection molded parts should on average have a wall thickness in the range of 2 mm to 4 mm, but thin-walled injection-molded parts can be up to 0.5 mm thin.
Rule of thumb: cooling time in seconds = 2 x d² (d = wall thickness d), so a plastic part with 2 mm wall thickness needs about 8 seconds cooling time, at 3 mm the cooling time is already 18 seconds.
Rib
Anstatt die Dicke der Wand zu erhöhen, werden häufig Rippen zu Erhöhung der Biegesteifigkeit eines Teils gebraucht infolge der Zunahme des Trägheitsmoments.
Rather than increasing the thickness of the wall, ribs are often needed to increase the flexural rigidity of a part due to the increase in moment of inertia.
Consider the following recommendations when introducing a rib:
✔ Do not exceed rib thickness of 60% of the nominal thickness
✔ Rib height less than 3 times the wall thickness
✔ A draft angle of at least 0.25 °
In addition, the alignment must be perpendicular to the axis and the corners at the attachment point must be rounded.
Radius
Sharp corners cause the resin flow, namely the internal stress. The increasing demand will also occur during the process. In contrast, the rounded corners can reduce stress concentration and avoid breakage. For effective injection molding, the inner radius should be at least equal to the wall thickness.
Draft angle
If plastic parts are difficult to eject, this can happen when the towing or ejection lanes occur. In order to enable faster ejection, a draft angle of 1 ° - 2 ° should be applied to all walls parallel to the separating direction of the clamping unit.
Undercuts
Undercuts complicate the demolding of an injection molding tool. If they (such as notches, grooves and other relief-like structures) occur in the injection-molded part, this can cause unacceptably high strains depending on their size and position during demoulding. Parts with large undercuts can not be removed from a simple injection mold. If you can not avoid the undercuts in the design, moving slide unit is required in the tool, which increase the tool costs considerably.
Shrinkage
It is a physical phenomenon in injection molding. After injection, cooling begins and reduces its volume and size. This reduction is commonly referred to as shrinkage, which is different for each material or material.
The shrinkage (processing shrinkage) is defined as follows:
S = (D - d) / D ( x 100%)
D = dimensions of the cavity
d = dimensions of the injection molded part